How to Fire a Big Cannon Without Bursting the Barrel
Firing a big cannon is a four-step sequence - load, assemble, aim, fire - and every step happens through redstone on the 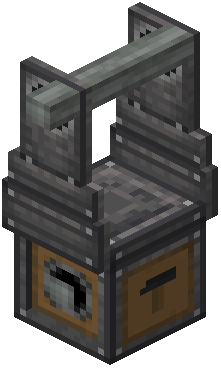 Cannon Mount, not by right-clicking the cannon. Skipping straight to the redstone is the single most common reason a new artillery piece does nothing at all.
The firing sequence
Build the cannon, place it so it sits on a Cannon Mount, and then work the mount's faces:
- Assemble. Power the hammer face of the mount with a redstone signal. The cannon becomes a single moving structure. Nothing else works until this has happened.
- Aim. Power the mount's other control faces to swing the barrel up and down, or side to side.
- Fire. Power the lit cannon face. That is the trigger.
- Reset. Cut power to the hammer face to disassemble. The cannon snaps instantly back to the exact position it was assembled at, which is worth remembering if you assembled it pointing at your own base.
A  Fixed Cannon Mount uses the same control faces but takes no kinetic input; you set its aim manually through the side interfaces and rotate the whole mount with a wrench. It cannot be extended.
If you need more space around the mount for redstone,  Cannon Mount Extension blocks add extra interface area. The arrow on their sides shows which mount they feed into. Mounts can also be turned upside down, either by wrenching their sides or by placing them on the underside of a block.
Powder charges: the number that decides everything
A cannon load is not "add gunpowder until it feels right". Two separate properties of the cannon material fight each other, and both are measured in  Powder Charge units.
Minimum projectile velocity per barrel decides whether the shot leaves the gun. Every barrel the projectile has to travel through demands a certain amount of push, and the barrel the projectile is sitting in counts toward that total. As a baseline, cast iron needs the equivalent of one Powder Charge for every barrel. Load a long cast-iron gun with too few charges and the projectile simply jams inside it.
Strength decides whether the gun survives. It is the maximum number of Powder Charge blocks the cannon can hold before firing risks bursting it. Cast iron safely handles two. Go beyond a cannon's strength and each shot carries a chance of catastrophic failure, which is destructive to everything nearby, not just the gun.
The breech you fit changes the strength figure. A Sliding Breech trades strength for loading speed. Screw Breeches are the strong option and take no strength penalty at all, which is what makes them the choice for long, heavily charged barrels.
There is a third way to wreck a cannon that has nothing to do with charge count: letting a fired projectile collide with something else still sitting in the barrel. Never leave a second projectile, a stray munition or a loader head in the bore when you pull the trigger.
The practical reading of all this is a narrow safe window. On a cast-iron gun, the number of powder charges must be at least the number of barrels and at most two, so a cast-iron cannon longer than two barrels needs a stronger material rather than more powder.
Making propellant
Powder Charge is shapeless: one  Packed Gunpowder plus one
  Empty Powder Charge. The empty charge is
  String,
  White Wool, String stacked vertically.
  Big Cartridge is the faster alternative for quick-firing guns and is worth the extra step once you are reloading under pressure.
Loading Big Cannons, by hand and by machine
A cannon must be disassembled before reloading through the muzzle. The three routes are:
- Cannon Loader. It behaves like a Mechanical Piston and extends its reach with
 Piston Extension Pole. Fit a
  Ram Head for normal loading, or swap to a
  Worm Head when you need to pull a jam back out. The loader, the munitions and the cannon all have to sit in line on the same axis.
 - Base Create contraptions. Mechanical Pistons, Gantry Carriages and Rope Pulleys can all push munitions in. Unlike the dedicated loader, these can carry other blocks on the same contraption without breaking anything, though only aligned munition blocks will actually enter the cannon.
- Handloading Tools. The
 Ram Rod pushes munitions in and the
  Worm pulls them back out. Both cost saturation and hunger, and the cost rises with every block pushed, so keep food on your hotbar during a long reload. Munitions can also be inserted directly into an assembled cannon.
Loading a Quick-Firing Breech
A Quick-Firing Breech is the answer to the disassembly requirement, because it loads from the back while the cannon stays assembled:
- Right-click the side of the breech to open or close it.
- Load the projectile first, by right-clicking the open side.
- Load the propellant second.
- Close the breech, then fire.
- Spent cases and any leftover munitions eject automatically.
Big Cartridge propellant is the recommended pairing here, because it reloads in one action instead of several.
Automating Quick-Firing Breeches is possible with Mechanical Arms. Right-click the Cannon Mount to register it as the arm's output. The breech must be closed for the arm to work, and it will refuse to load while the breech is open. After a shot, the same arm extracts the empty cartridges if you give it a deposit area, and that deposit should carry an empty Big Cartridge filter so spent cases do not get mixed back into the ammunition supply.
The two mechanical breeches behave differently. A Sliding Breech opens under rotational force and lets you load from the rear at the cost of cannon strength. Using a Screw Breech is slower: it needs rotational force to unlock, then a kinetic contraption to move it clear for loading, and closing it seals the gun again with no strength penalty.
Using Autocannons
Autocannons still mount and assemble the same way, but the firing face works as a throttle rather than a switch: the stronger the redstone signal, the faster they shoot. They take item munitions as input and eject spent ammunition out of the breech.
They can also be customised in place. Wrench the end of the barrel to change the barrel-end type.  Recoil Springs make the barrel visibly kick back when firing. Wrench the breech itself to add handles, which switches the gun from kinetic control to direct player control, and a seat can be placed on a handled breech, though the seat is purely cosmetic. Wrenching the breech again removes the handles and returns any seat to you.
Fuzes and when the shell goes off
Explosive shells need a fuze on the front, and the choice matters more than it looks:
 Impact Fuze detonates on hitting something, but it is simple enough that it sometimes fails, and it never triggers on bounces or grazes.
 Inertia Fuze is the more sophisticated version of the same idea and fires far more reliably, including on ricochets. It also works as a base fuze.
 Delayed Impact Fuze and
  Delayed Inertia Fuze start a timer on impact, with the inertia version again the reliable one. Right-click either to set the delay.
 Proximity Fuze detonates near a block, with a configurable distance.
 Timed Fuze counts from launch instead of from impact.
 Wired Fuze waits for a redstone signal and will not explode in flight, which makes it the one to use for improvised charges rather than for shooting.
Impact, delayed impact and proximity fuzes must be mounted on the front of a shell and will not work as a base fuze. Both inertia types work in either position.
Covers the mod’s in-game guide topics: Automating Quick-Firing Breeches Loading a Quick-Firing Breech Handloading Tools Loading Big Cannons Using a Screw Breech Using Autocannons
 Cannon Loader