
Finding Sacilite Biomes and Their Valuable Structures
Identifying the Biomes
Two temperate biomes hold the key to sacilite-related exploration: the Sacilite Bloom and the Sacilite Canyon. Both share a temperate climate with a temperature of 0.5, so you cannot distinguish them by temperature alone. Instead, look for visual differences in terrain and vegetation. The Sacilite Bloom is the primary biome of interest, as it is the only one that generates the valuable structures described below. The Sacilite Canyon is a separate temperate biome, but it hosts no unique structures of its own beyond its terrain.
The Sacilite Bloom also supports creature spawns of the drake, so if you encounter drakes in a temperate area, you are likely inside a Bloom rather than a Canyon.
Structures in the Sacilite Bloom
Within a Sacilite Bloom, four distinct structures can generate. Each has its own spacing rules, so you can use these to predict where to search.
Rainbow Sacilite Geode
The Rainbow Sacilite Geode is the rarest and most visually distinctive structure. It attempts to generate once per 32x32 chunk region, meaning you will typically find it very far apart from other geodes. The minimum distance between two geodes is 12 chunks. Because of this sparse placement, exploring a Bloom systematically over a large area is required to locate one. When you do find it, the geode is a major landmark and source of rainbow sacilite material.
Sacilic Den
The Sacilic Den is a smaller, more common structure. It attempts to generate once per 14x14 chunk region, with a minimum spacing of 5 chunks between dens. This makes dens roughly twice as frequent as geodes. Dens are likely to contain useful sacilite-related resources or shelter, but the facts do not specify their exact contents. Search for them by covering ground in a Bloom, checking caves and overhangs where a den might be tucked away.
Sacilite Palace
The Sacilite Palace is a large, significant structure. It attempts to generate once per 30x30 chunk region, with a minimum distance of 24 chunks between palaces. This makes palaces rarer than dens but slightly more common than geodes. A palace is likely to be a major find, possibly containing valuable loot or architecture. Given its size, it should be visible from a distance if you are exploring on the surface.
Tremor Nest
The Tremor Nest generates in a different biome: the foolish:sacilite_cavern. This is not the Bloom or Canyon. The Tremor Nest attempts to generate once per 12x12 chunk region, with a minimum spacing of 4 chunks between nests. This makes it the most frequent structure among those listed. If you are in a cavern biome and seeking Tremor Nests, you can expect to find them relatively close together compared to the Bloom structures.
Practical Search Strategy
To find the valuable structures, your primary target is the Sacilite Bloom biome. Start by locating any temperate area with drakes. Once you confirm you are in a Bloom, plan a grid-based search. Because the spacing rules are chunk-based, moving in straight lines and covering a wide area is more effective than wandering randomly.
- For Dens, search thoroughly in a moderate area; you should find one within a few hundred blocks.
- For Palaces, travel further; they are spaced at roughly 24 chunks apart, so you may need to cross several thousand blocks.
- For Geodes, be prepared for a long expedition; 32-chunk regions mean they are extremely spread out.
If you are in a Sacilite Canyon, do not expect to find any of these structures. Instead, use the Canyon as a sign that you are in the wrong temperate biome and continue searching for a Bloom.
For Tremor Nests, you must leave the Bloom and locate a sacilite cavern biome. The facts do not describe how to identify this cavern, but once you are there, the nests are relatively frequent.
Covers the mod’s in-game guide topics: Sacilite Bloom Sacilite Canyon Rainbow Sacilite Geode Sacilic Den Sacilite Palace Tremor Nest
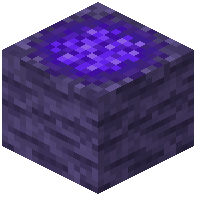 Sacilite Geode