
Nuclear Reactor Setup, Fuel Rods, and Neutron Heat
The Nuclear Reactor is Modern Industrialization's largest multiblock and its highest-output generator, producing hundreds of times more EU per tick than a diesel setup. It does this indirectly: the reactor itself makes no power. It makes heat, you feed it water, and the steam that comes back out drives your turbines. Getting that loop right is the whole job.
Before anything else, one reassurance that changes how you should approach it: the reactor cannot explode, leak radiation, or damage terrain. The only thing a runaway reactor destroys is the items sitting inside it. That makes experimentation cheap, and experimenting is genuinely the recommended way to arrive at a layout you like.
What you have to build
Four blocks make up the structure, and all four are gated behind the same alloy.
Nuclear Alloy is a mix of blastproof alloy, beryllium and cadmium. A Packer turns one  Blastproof Alloy Plate, one
  Beryllium Plate and one
  Cadmium Plate into a
  Nuclear Mixed Plate over 200 ticks at 2 EU/t. That mixed plate then goes into an Implosion Compressor with
 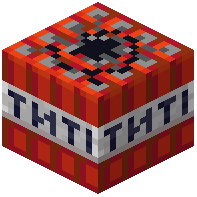 Industrial TNT and comes out as three
  Nuclear Alloy Plate. Everything else is built from those plates:
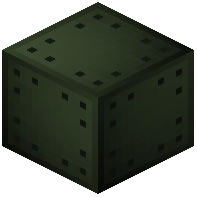 Nuclear Alloy Casing - eight Nuclear Alloy Plate around one
 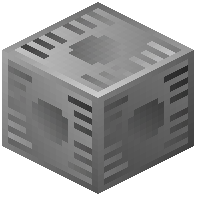 Turbo Machine Hull, assembled over 200 ticks at 8 EU/t. This is the bulk material of the structure.
- Nuclear Item Hatch - eight plates around a Highly Advanced Item Input Hatch.
- Nuclear Fluid Hatch - eight plates around a Highly Advanced Fluid Input Hatch.
- Nuclear Reactor controller - four
 Nuclear Alloy Large Plate in the corners, two
  Processing Unit, two
  Cadmium Control Rod and one
 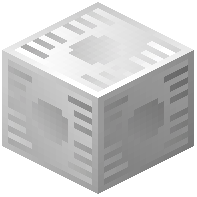 Highly Advanced Machine Hull in the centre.
The reactor comes in four selectable sizes, chosen from the controller's interface. The grid of component slots grows with the size, from five by five at the smallest up to eleven by eleven at the largest. Start small. A five by five reactor is far easier to reason about, and the fuel economics do not change.
The upper part of the structure is where hatches go. Each hatch position can take a Nuclear Item Hatch, a Nuclear Fluid Hatch, or a plain casing if you want that cell left empty. Every hatch has one input and two outputs, and the input slots form the grid you see when you right-click the controller.
Fuel rods and how to make them
An Assembler builds every fuel rod from the same pattern: two  Blastproof Alloy Curved Plate, one
  Large Motor, two
  Robot Arm, eighteen rods of the fuel material, 500 mB of Soldering Alloy and 100 mB of Helium, over 200 ticks at 16 EU/t.
Five fuel types exist: plain Uranium, LE Uranium, HE Uranium, LE Mox and HE Mox. Single rods can be stacked up: two single rods plus two Nuclear Alloy Plate make a double rod, and two doubles plus two more plates make a quad. Quad rods pack four times the fuel into one grid cell, which is the usual way to build a dense reactor without enlarging the structure.
Cadmium Control Rod is built the same way, from eighteen  Cadmium Rod instead of fuel. Cadmium absorbs neutrons without producing any, which is exactly what you want as a moderating filler between fuel cells.
How the reactor actually works
Fuel produces neutrons, and neutrons come in two kinds. Fast neutrons carry energy; thermal neutrons do not. A neutron travels in a straight line until it meets a non-empty hatch or leaves the reactor entirely. Fast neutrons that escape take their energy with them, which is pure waste.
When a neutron meets a component, one of two things happens:
- It scatters. The neutron changes direction at random. A scattering fast neutron may slow to thermal, and the energy it loses becomes heat in that hatch.
- It is absorbed. The neutron stops there, and if it was fast, its energy also becomes heat.
Absorption in fuel is the useful case, because that is what produces more neutrons. Those new neutrons are always fast and always fly off in random directions, and their creation dumps additional heat straight into the hatch. Critically, nuclear fuel absorbs thermal neutrons far better than fast ones, which is why a good layout surrounds fuel with material that scatters and slows neutrons rather than letting them fly out of the machine.
Every component also has a maximum number of absorptions. When a component reaches it, it is either destroyed or converted to a depleted version.
Heat, and why items die
Each hatch stores heat and has its own temperature. Heat moves in three ways: to an adjacent hatch, out of the reactor entirely if the hatch is on an edge (that heat is simply lost), or into steam if the hatch is a fluid hatch with water in it. The speed of the first two is the heat transfer coefficient of whatever is inside the hatch multiplied by the temperature difference.
If a hatch goes above the maximum temperature of the item inside it, that item is destroyed. This is the one real failure mode, and it is why players lose expensive quad rods to a reactor that looked fine.
There is a built-in safety valve. Above a certain temperature threshold, the number of neutrons a fuel cell generates starts falling, and it keeps falling until it reaches zero. That wastes energy, but it guarantees the reactor stabilises rather than running away. The threshold, the neutron count and the direct energy release for each fuel are all visible in your recipe viewer.
Getting power out
Put water into a Nuclear Fluid Hatch and the heat in that hatch converts it to steam. Feed that steam to steam turbines, or run it through a Heat Exchanger first to work with higher-grade steam. The reactor is also the only source of some materials, and it can breed fluids for fusion: Deuterium and Tritium both come out of fluid cells that have been absorbing neutrons.
Recycling depleted rods
Depleted rods are not waste. A Centrifuge processes each of them over 6000 ticks at 32 EU/t, and the recovered plutonium is what makes the whole cycle worth closing:
 Depleted Uranium Fuel Rod - 53 Uranium 238 Tiny Dust, 27 Plutonium Tiny Dust, plus a 66% chance of one Uranium 235 Tiny Dust
 Depleted LE Uranium Fuel Rod - 48 Uranium 238 Tiny Dust, 24 Plutonium Tiny Dust, 6 Uranium 235 Tiny Dust
 Depleted HE Uranium Fuel Rod - 36 Uranium 238 Tiny Dust, 18 Plutonium Tiny Dust, 18 Uranium 235 Tiny Dust
 Depleted LE Mox Fuel Rod - 48 Uranium 238 Tiny Dust, 30 Plutonium Tiny Dust
 Depleted HE Mox Fuel Rod - 36 Uranium 238 Tiny Dust, 36 Plutonium Tiny Dust
Plutonium has no other source in the mod, so reprocessing is not optional if you want a plutonium supply. Mox rods return the most of it, which is the reason to run them even though they are more work to produce.
A sane first build
Build the smallest reactor size. Fill the centre with a small number of single fuel rods, ring them with cadmium control rods, and put fluid hatches with water on the edges where heat naturally drains. Watch the grid in the controller interface: it shows neutron flow and the absorption count in each hatch, which tells you immediately whether neutrons are escaping the sides or bouncing usefully between cells. Only once temperatures hold steady should you swap single rods for doubles and then quads.
Related pages
Blastproof Alloy Curved PlateDepleted HE Uranium Fuel RodDepleted LE Uranium Fuel RodHighly Advanced Machine HullAdvanced Fluid Input HatchDepleted Uranium Fuel RodNuclear Alloy Large PlateAdvanced Item Input HatchDepleted HE Mox Fuel RodDepleted LE Mox Fuel Rod